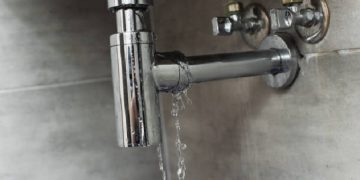


A leaking faucet is a common household problem that begins with a few drops and ends with excessive water consumption, streaks on the fixtures, and gradual wear and tear. Even a small leak can eventually damage the cabinetry under the sink and cause an unpleasant odor due to constant moisture.
To fix a leak reliably with plumbing services in Calgary, it’s important to first determine where the water is coming from: from the spout, under the handle, at the base of the body, or in the area where the flexible hoses connect. This determines the steps and the parts that need to be replaced.
How to Fix a Leak: Step-by-Step Solutions
Before repairing, turn off the cold and hot water at the hoses or riser, then open the faucet to relieve the pressure. Plug the drain and line the sink with a drop cloth to prevent losing small parts. If you can’t access the shut-off valves or the leak gets worse, it’s a good idea to contact a plumbing service in Calgary.
If the spout is dripping
- Determine the type of faucet: single-lever (cartridge) or two-handle (valve valve).
- Remove the handle: there’s usually a locking screw under the decorative cap.
- Disassemble the unit and replace the cartridge or valve valve with one of the same size and type.
- Before reassembling, clean the seat from any deposits, wipe dry, and reassemble without applying excessive force.
If water still drips after replacement, sand in the system may be the cause: flush the aerator and check the coarse filters (if any). (installed).
If the leak is coming from under the handle or at the stem
- Often the top seal or a worn ring is to blame: replace the rubber seals with new ones of the same diameter.
- Check the pressure nut: tighten it slightly, but do not overtighten it to avoid cracking the housing or jamming the handle.
- If there are cracks on the plastic parts inside the unit, replace the entire part, as the sealant will only provide a temporary effect.
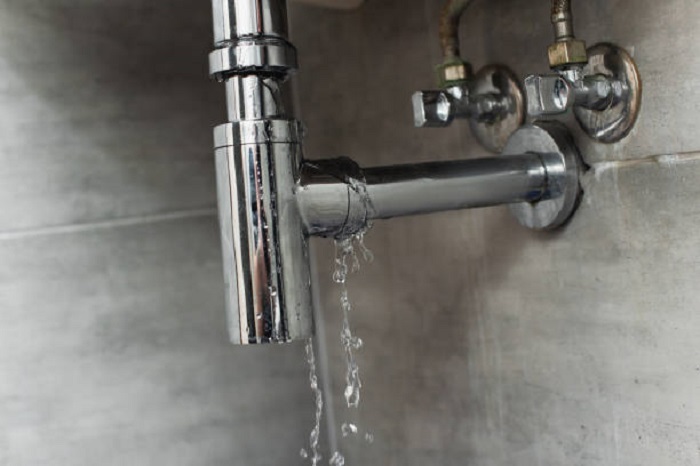
If the leak is at the base of the faucet or under the sink
- Inspect the faucet mounting point to the sink/countertop: tighten the pressure nut or mounting bracket.
- Check the condition of the lower sealing ring (gasket) between the faucet and the surface: if deformed Replace.
- Inspect the flexible hoses: if there are any bulges, rust on the braid, or leaks near the crimp or nut, replace the entire hose.
- Recheck the threaded connections: the gaskets should be intact and the nuts tightened evenly.
Prevention to prevent the faucet from leaking again
- Regularly clean the aerator of scale and sand.
- Do not overtighten the handles and lever: excessive force accelerates wear of the shut-off elements.
- If you have hard water, periodically descale the threaded parts and spout.
- If you experience frequent pressure surges, install a pressure reducer and check the condition Filters.
Correctly identifying the leak area and replacing worn components usually completely resolves the problem. If the faucet body is cracked, the seats are damaged, or the leak appears in multiple spots, the optimal solution is to replace the entire faucet.
How to pinpoint a leak by water marks and sounds
Turn off the water, wipe the faucet and the surrounding area dry, then place a dry cloth or paper towel under each potential leak. After 5-15 minutes, inspect where the first damp spots appear: this will most quickly pinpoint the source.
If the leak only appears when the water is turned on, turn on the water gradually: first cold, then hot, changing the pressure and the position of the lever/valves. Listen for sounds: dripping, hissing, whistling, and rubber “crunching” can help distinguish a drip from a micro-leak under pressure.
Signs of a Leak Based on Water Traces and Sounds
- Dripping from the spout (spout): a wet trace inside the spout, drips into the sink after turning off the water. The sound is a rare “drip-drip” with equal pauses.
- Drip at the base of the spout (swivel spout): a wet ring at the pivot point, water flows down the body. The sound is a quiet “rustling” when turning the spout and a wet trace after the movement.
- Leak from under the lever (single-lever): drops appear around the stem/under the decorative cover, traces “tracks” down the body. Sound – a slight hissing sound when turned on/switched to mixed mode.
- Leaking from under the valves (two-handle): the area around the valve shaft becomes wet, sometimes water leaks out when turning. Sound – creaking/crunching when closing and occasional drips after shutting off.
- Leak at the hose connection under the sink: wet nuts, drips on the hose connections, a puddle in the cabinet. Sound – a frequent “drip-drip” sound along the wall of the cabinet or a “clacking” sound along the trap.
- Leak where the faucet attaches to the sink/countertop: water appears around the base from above or drips from below the stud. Sound – drips “inside the cabinet,” even with a dry top.
- Drip from the shower head/hose (if there’s a shower): wet spots on the hose, drips from the connections, marks on the wall. Sound – faint hissing or frequent dripping under pressure.
- Drying and inspection: completely dry the faucet, sink, and cabinet; Place dry napkins under the body and on the connections.
- Test without pressure: With the valves/lever closed, observe for 10-15 minutes – drips from the spout usually indicate an internal shut-off valve.
- Test under pressure: Turn on the water at low pressure and move the components one by one (turn the spout, switch modes) – the source is located where the napkin gets wet first.
- Dividing into zones: if the surface is dry but the cabinet is wet, check the connections and fasteners from below; If the body is wet, look for a leak near the lever/valves or at the base of the spout.
- Compare with sound: a rare “drip” indicates a drip leak, while a “hissing/whistle” indicates a micro-leak under pressure on the threads or in the cartridge/valve box.
Summary: The easiest way to find the exact location of a leak is by using the “dry > test > where it got wet first” principle, supplementing the inspection with characteristic sounds. This approach allows you to quickly distinguish a leak from the spout from leaks at the connections, at the base of the spout, under the lever/valves, or under the sink, and proceed to the correct repair method.


